Monday, April 28, 2014

351 Cleveland Rebuild - Part 2 - Assembly

     So after all of the cleaning and checking the 351 Cleveland parts at the machine shop, George figured out what could have potentially been the burning oil problem with the engine. We ended up replacing all of the valve stem seals and he had used a trick that he had learned for the crank seal. Instead of using the standard hard plastic/rubber seal he had instead used a cloth type of seal. The stock seal has a hard tab on it to prevent it from spinning with the crank. This tab would often break off over time. The seal would end up spinning with the crank and start to fail. Along with the standard rebuild kit, all new piston rings will hopefully solve the burning oil problem that the Cleveland had. George then kindly put the rotating assembly together for us including the stud kit for the new roller rockers for the motor. We reused the same cam as it was in good shape and had great specs being a mid range cam. All we needed to do was clean the Cleveland, paint it, and put it back together!

Here I'm masking up all of the areas we don't painted like the exhaust ports, around the valve covers and the intake.

After picking up a few cans of the Duplicolor Ford Blue from Canadian Tire and giving the engine a good degrease my buddy Kody came over and we painted the Cleveland right in the driveway.

All painted. Nothing like the cool Ford blue!

Here's after bolting on a few blasted and painted parts. Notice the Fram oil filter. It wasn't until after reading about these filters had we decided not to ever use one again. After reading some reviews on better filters and watching a few videos about them we decided to go with a NAPA filter that was much better quality.

Here's just a quick look at what a couple hours of good work can do to a crappy looking valve cover. This is after I sanded by hand and polished one of the aluminum boss style valve covers for the Cleveland. It looks awesome...just a little bit more and it should be perfect.

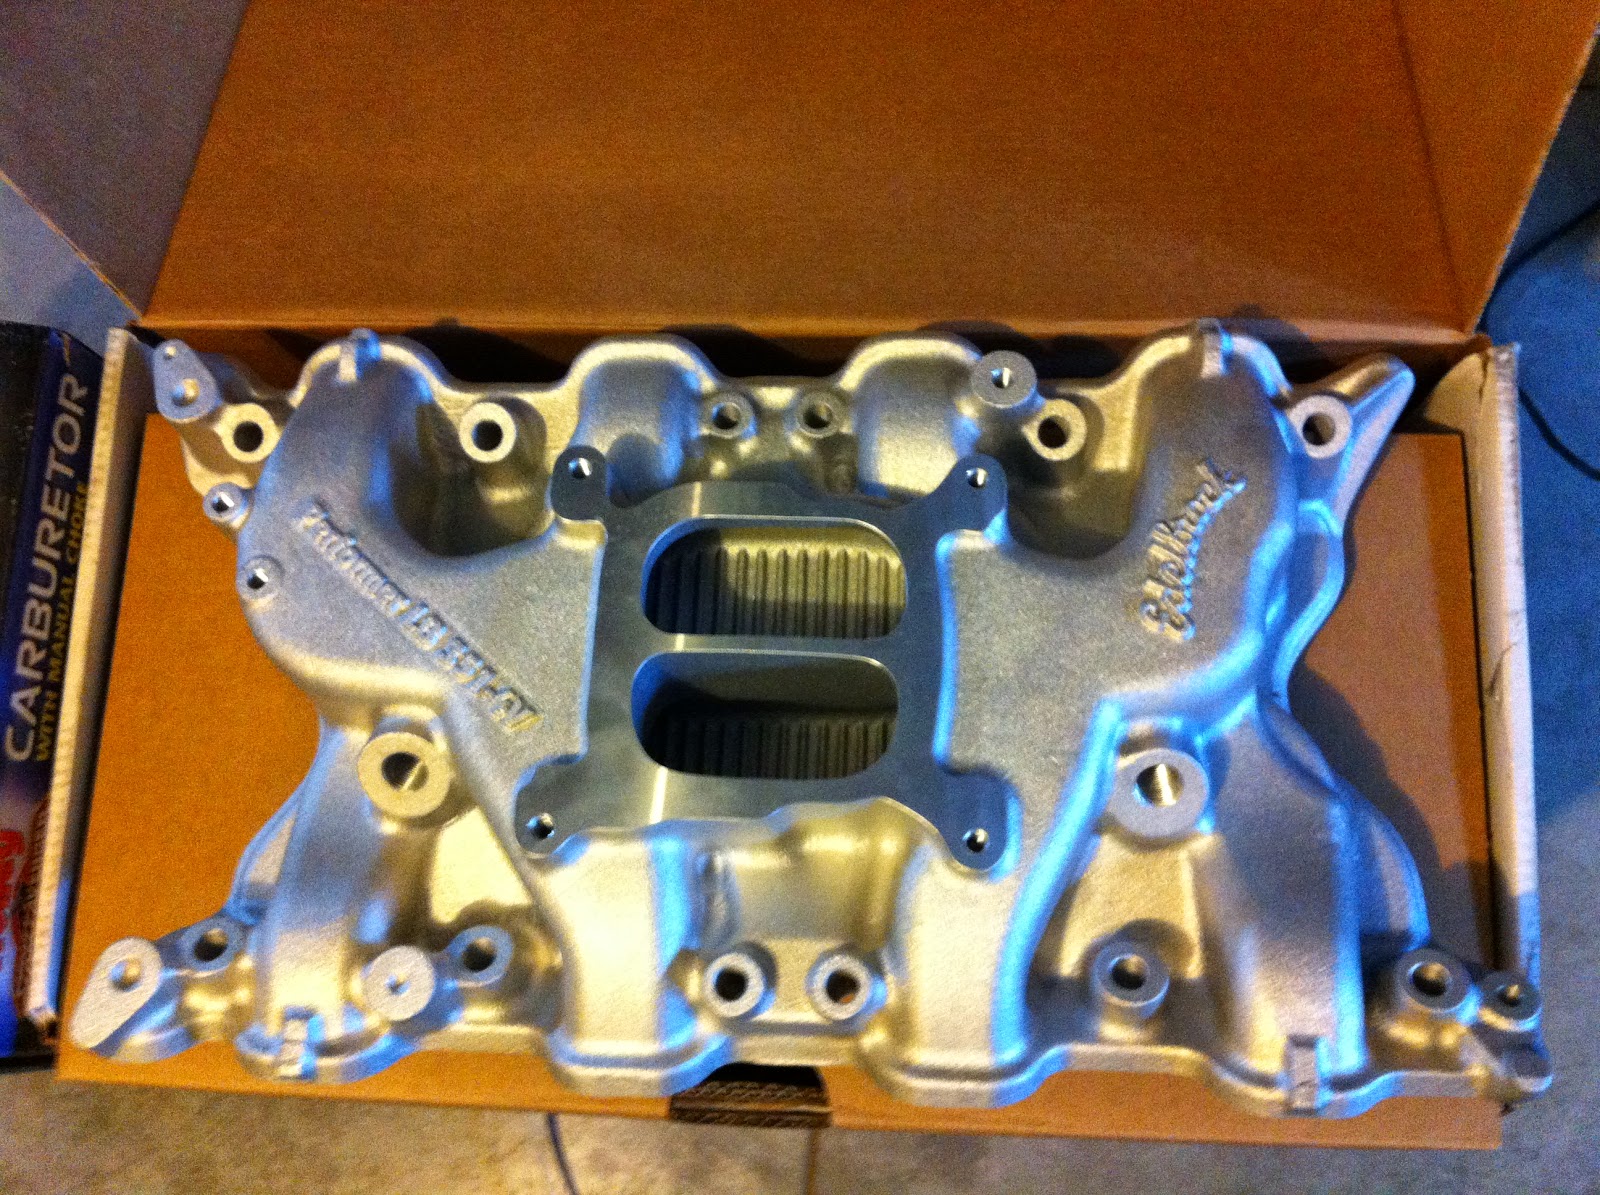
Let's take a quick look at the old Edelbrock Torker II intake compared to the new Edelbrock Performer intake. Yes...they are both aluminum but the big difference here is the single plane versus the dual plane where the carb sits. The single plane is better for higher range rpm applications while the dual plane is great for low to mid range rpm applications.

Don't you just love the look of new and cleaned up parts?

 Threw the carb back on and some other final parts.

 When we put the fancy yellow spark plug wires on we had to steal/swap the distributor cap off of the white boss for the plug heads to fit on the distributor cap. Looks sweet with the yellow though!

 Just had to steal the air filter off of White Boss since our new one wasn't in yet. Looks ready to rumble.

After just a tad more polishing of the valve covers with a little bit more help from my buddy Kody and the end result of these valve covers really paid off. Look at the reflection of those yellow plug wires. Awesome.

Next up is the Ford Four Speed Toploader rebuild so we can put them together and fire this 351 Cleveland up!


Sunday, April 27, 2014

351 Cleveland Rebuild - Part 1 - Teardown


     So during the tear down of the Cleveland we learned a lot about what type of block and engine that it was with all of the different parts the previous owner had used to rebuild it. My buddy Kody and I tore it down in one day bagging and tagging all of the parts as we went along just in case we decided to reuse them. The engine was running great when it came out of my uncle's mach 1. I know that it was burnout capable in what was an automatic transmission car at the time so that was a good sign! He is putting in a 428 Cobra Jet 4-Speed with line lock(awesome..). So we decided to rebuild this motor not only because we wanted to do a full restoration for the car but because my uncle had said there were a few problems with the engine. He said it had terrible low end..which led my dad and I to believe that the Torker II intake was the culprit for this problem. He said there was also a problem with the engine puffing white smoke sometimes while running which is a sign of the engine burning oil(definitely not good!). So hopefully a rebuild and replacement of all seals would fix this problem. Other than this we wanted to upgrade the engine a bit and use roller rockers in addition to a new intake and higher rated valve springs. A list of some of the parts found in the 351 Cleveland will be listed at the bottom. Enjoy!

 
Before removing the oil pan for inspection, we took a look at the casting number and what they indicated. This is a 1972 block. The D2AE-CA code for a 351 Cleveland could potentially mean a Cobra Jet block but ford did make blocks in this casting that were 2-bolt main caps as well.

A quick inspection with the oil pan off reveals the Cleveland block is indeed a 4-bolt main block. It's all serious business now!

There's me(left) and my buddy Kody(right) just after inspecting what's under the valve covers. The Cleveland had factory non-roller rockers sitting on stock 4V heads.

The Cleveland was running an Edelbrock Torker II intake manifold that somebody had put on the motor. This intake is great for high end applications as it has a single plane and full open surface where the carburetor sits. Our plan is to run a more mid range dual plane intake allowing the engine to run better at low rpm's.

In these pictures it's really clear to identify some of the main characteristics of the 351 Cleveland. The canted valve setup as seen in the top picture allows for a smoother flow of air in an out of the piston cylinders. Also take note of those MASSIVE intake ports. The Cleveland definitely did not have a hard time breathing that's for sure!

 The rockers and pushrods were then removed allowing us to then be able to remove the cylinder heads.

Looking at the bottom side of the heads, they proved to be open cylinder. This was a great site to see when we saw those high-compression domed pistons sitting in the cylinders. With this combination of domed pistons and open chamber heads the compression ratio is usually around 10.5:1. If you notice the what looks like a punched out hole in the top of the Cleveland closest to the wall near the distributor do not be worried. This is common and was used for better flow of oil in the system.

All of the main caps were taken off and pistons taken out here as Kody is showing. LOL


Here the Cleveland is down to the bare block except the cam. Sweet!

 So the 351 Cleveland is all torn down. We discovered that the engine was bored .30 over which is nothing to worry about. We also found a sleeve in one of the cylinders but also nothing to worry about because there are engines today that are purpose built with sleeves in all cylinders! Fun tear down and now the block and parts are ready to go to the machine shop for checking and honing of the cylinders.

351 Cleveland Specs and Parts

  • 351 Cleveland Block: D2AE-CA with 4 bolt main caps
  • Cylinder Heads: D3ZE-AA open chamber
  • 1.72 Rocker arm ratio
  • Nodular Cast Iron Crank
  • TRW L2348 Pistons .030 over
  • Camshaft: Hydraulic cam - Crane Blazer 292-2H


Past Cars....

1969 BOSS 302, 1970 BOSS 302


1970 BOSS 302, & THE KIDS (Ashley 11 years old Tyler only 9 yrs old here)


1969 BOSS 302

Having owned a couple of real and rare G-Code BOSS 302s, which were awesome cars, we felt limited in the amount of mods we could do to these rare and valuable cars as it would likely de-value them.  So, with project Lola, we've opted to build a BOSS 302 clone, with the foundation being a plain-Jane 70 Sportsroof.  This way, the sky is the limit in what mods we can do and we don't have to worry about de-valuing a real G-code BOSS.   


HOW DID TYLER GET INTERESTED IN CLASSIC MUSTANGS?  HMMM.......

Tyler, 3 years old, already getting "mustang" training on a 1969 Mach 1

Same car as above, complete restoration
1969 Mach 1 351W Automatic


4 years old, another 1969 Mach 1


Same car as above, complete restoration
1969 Mach 1, 390 Automatic


1969 Mach 1 428 CJ "R-Code" 4-Spd


A Parts Car - "Mustang Sally"


I think we could have fit two more in the driveway!


1968-1/2 428CJ


1969 Parts Car


1969 Mach 1 428CJ


1969 Mach 1 428CJ


1970 Sportsroof


1970 "BOSS 351" Restomod
351CJ Tremec 5-Spd


1969 Mach 1 428CJ C6 Auto


1969 BOSS 302
(Current Driver)


Saturday, April 26, 2014

The Beginning

     This wasn't the first 1969-1970 fastback mustang that my dad has owned, but if I were to say the least, this car is probably what captured my interest the most. I was 16 years old and in the phase where I was helping my dad in the garage most of the time either on his Ram3500 or my moms BMW. I was still way to interested in video games but once he bought this car my opinions really changed on being in the garage. I found out that there's more than just maintaining your daily drivers. You can restore and modify cars to the way you want them to perform or look. Although we didn't really do too much to this mustang it sure was fun to ride in and it was the first car that I was actually interested in working on considering it broke down all of the time! This "Boss 351" was a 1970 fastback with a screaming 351 Cleveland Cobra Jet. This was such a cool car because it was a 1970 with painted on gloss black 69 boss stripes and gloss black hood and tail panel with a boss 429 hood scoop. It was really whatever the previous owner had wanted to do to his car. I really liked the idea of doing whatever you wanted to your car.
     That being said, it must have been pure coincidence that my uncle was doing an engine swap in his 70 mach 1 from a 351 Cleveland to a 428 Cobra Jet that he had just rebuilt. My dad and I were interested enough and my dad seemed like he wanted something mustang to do since we had just moved back from living in Germany for four years with no mustangs! I'm only saying that since all I can remember are piles of unrestored 69-70 fastbacks sitting in the driveway during my childhood. So considering he knew what he was doing and I wanted to learn a thing or two about cars we decided to take the Cleveland off my uncles hands.
     I don't think we really even considered doing a car restoration at the time that we had bought the motor. I was scanning ebay every once in a while for unrestored fastbacks but nothing serious at the time. At the time I was really mainly interested in figuring out how internal combustion engines worked because I didn't really know and it seemed pretty cool! I took down some old engine and ford books that my dad had stored up on the top shelves and slowly pieced together how these beasts worked. I was really excited to start tearing down this motor after reading up on the different types of 351 Clevelands I was really hoping it would be a 4 bolt main block capable of some serious power.

Lola

     Alright so I guess I'm going to have to give the short story behind the name that we decided to give this car.. I'll start by saying that I'm just about 19 now, I was 16 then. I thought it would be really sweet if the car had a name just like how the 67 fastback in Gone in Sixty Seconds had. So my best friend Kody and I sat down and had a serious discussion.. The name had to be original, nothing common. I remember we were brainstorming car names on a word file on my computer in my room one night, then we narrowed it down to a few names and we finally decided on Lola. It stuck, so might as well keep it now. Kody and his dad had just bought a 1967 firebird and a 400 motor that they were rebuilding at the same time. What are the odds?! Anyways if I remember correctly we decided his firebird should be name Layla but I don't think stuck. I think it's funny that they are both pretty cool songs too though.


     Well, I've started this blog now at the age of 19. The car is still in the long but fun process of restoration. I decided to start this blog mainly because I would like to document the process of every detail on this car so I can look back at it or show people who care about this stuff enough to read it. Hopefully it helps anyone who is in the midst of a DIY mustang restoration as well though too. Not only this but there is a blog called Night Mission Boss 302 that kind of got me interested on this blog site as well. My plan is to start going through all of the pictures that I have taken of this restoration so far, and since they are in chronological order I plan to touch on every step of the restoration in as much detail as I can remember and hopefully catch up to where we currently are by the time this car is done. My dad and I have been doing a fairly meticulous job so far on the car so this isn't just another boring factory restoration! This car is being built to be driven. Weather permitting as my dad would note. Feel free to ask questions as I post. Enjoy.
     Above is a picture of my dad and I on pickup day. Before all of these posts gets started on this blog I would just like to thank him because without him none of these cool pictures would be put up on here and I wouldn't be able to experience this awesome project! THANKS DAD! LOL